This is a brief overview of how to install the Vero Door inside your door frame. For a more detailed guide, watch our video here on installation and trimming for smaller door frames.
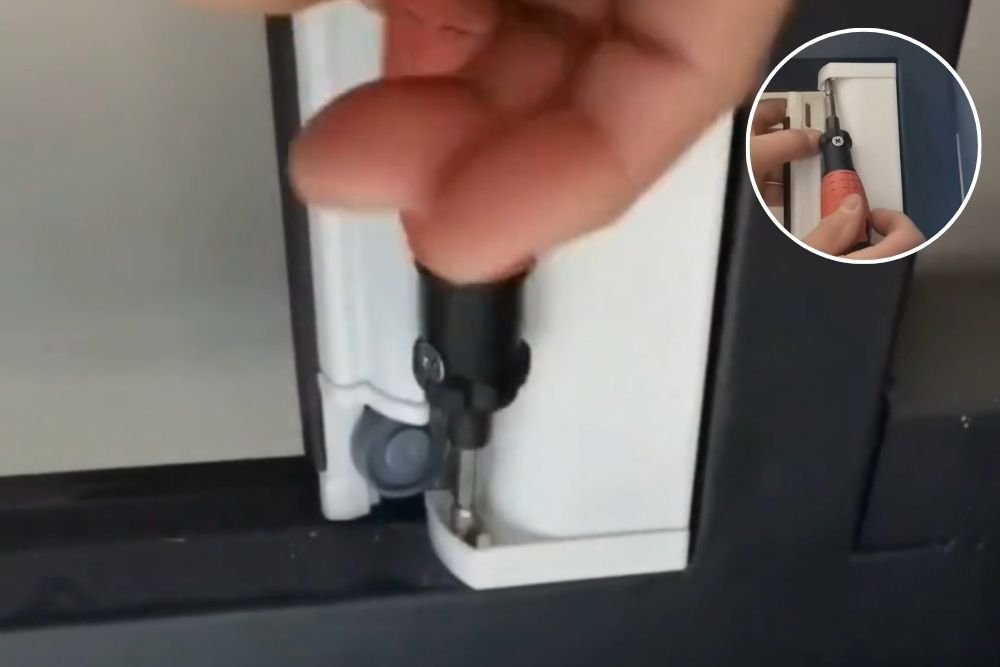
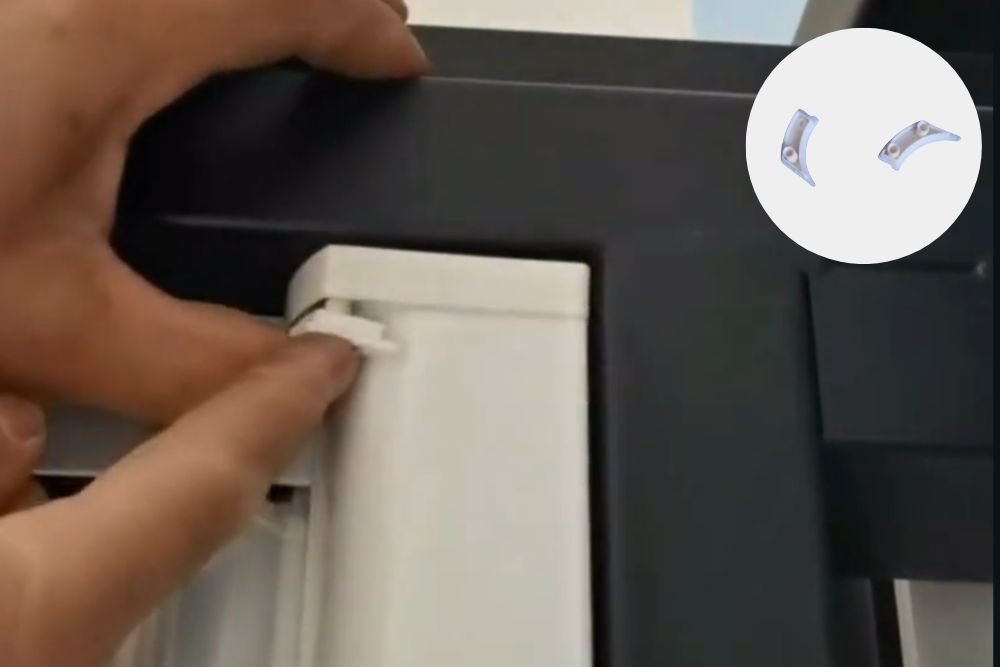
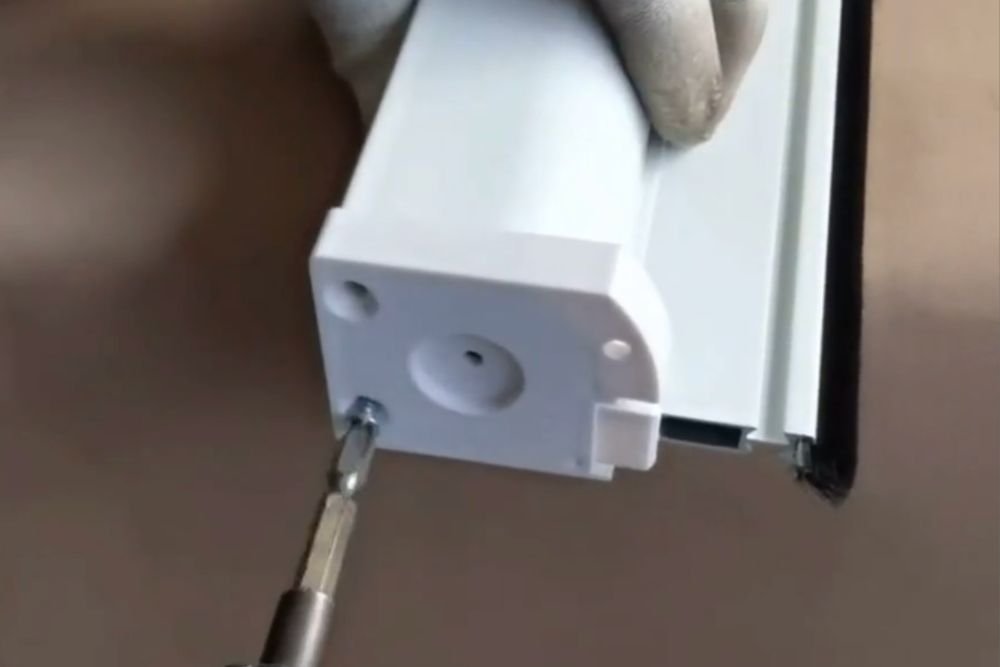
After selecting which side of the frame to install the cartridge on, attach the castor to the bottom of the door handle and the top catch to the top. Then, position the cartridge in place and secure it with screws at both the top and bottom.
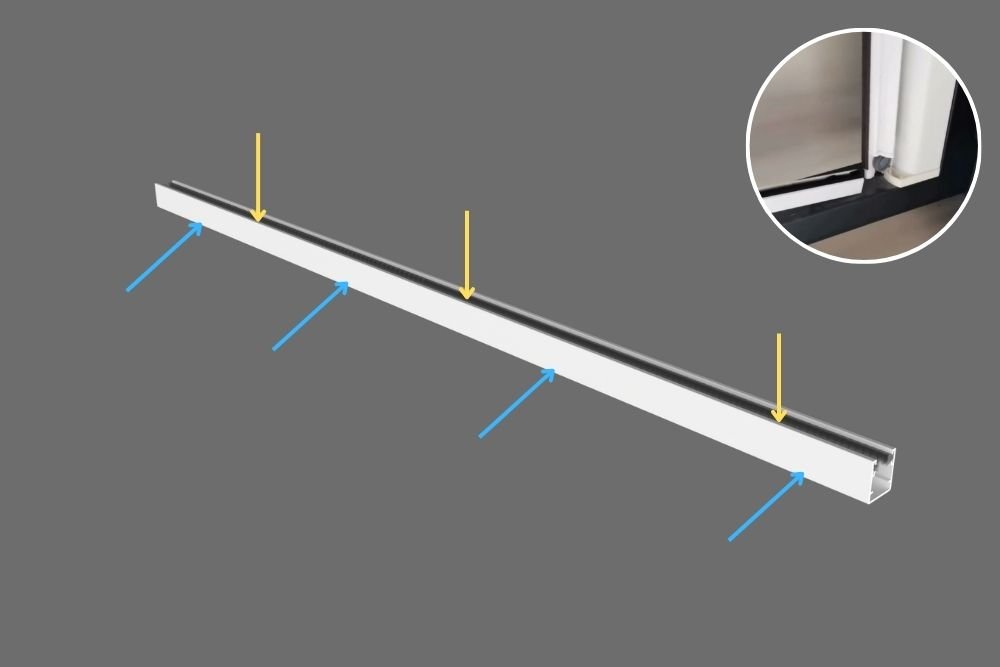
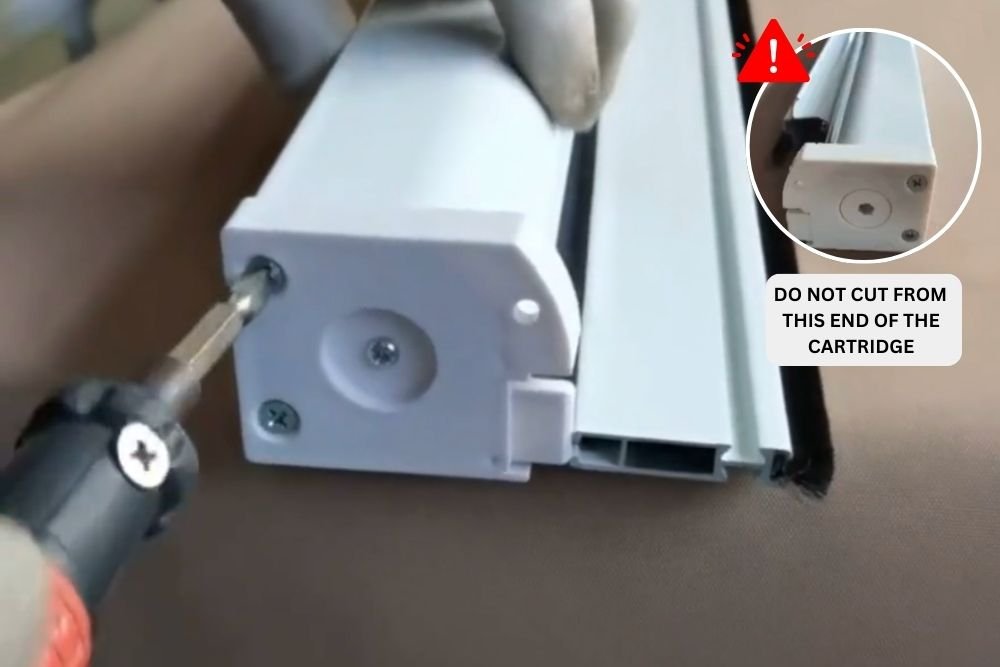
Pro Tip: Before securing it, drill three evenly spaced fixing holes (YELLOW ARROWS) into the base of the track. For better visibility and easier drilling, remove the two brush strips first.
At this point, we advise drilling drainage holes (BLUE ARROWS) near the bottom of the inner face of the track. Larger holes are preferable, using a drill bit of up to 4.5mm diameter. This will help prevent water buildup and overflow in the bottom track
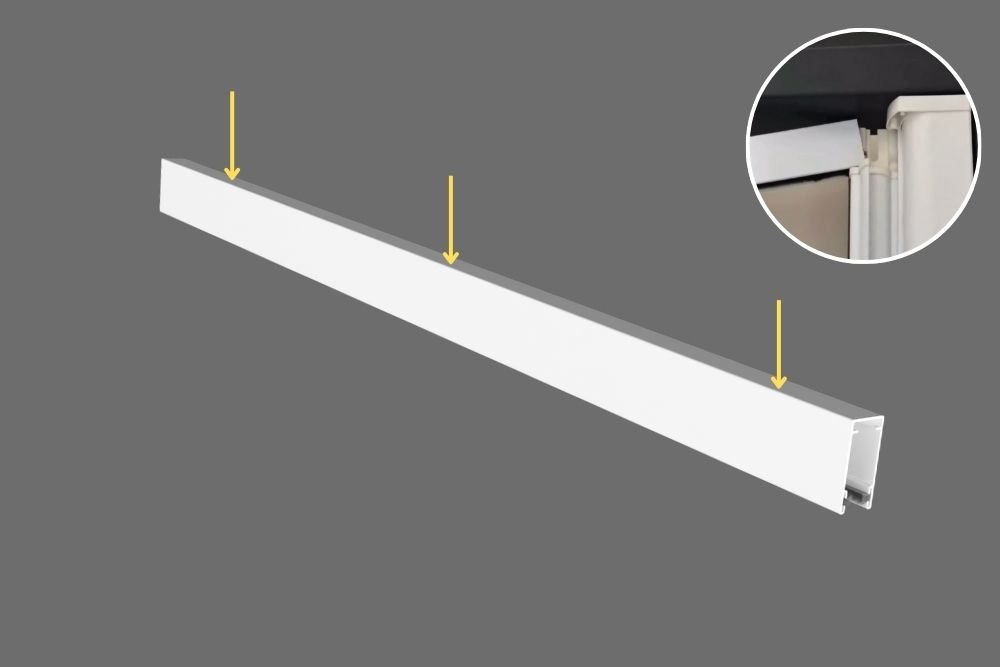
Pro Tip: Before securing it, drill three evenly spaced fixing holes (YELLOW ARROWS) into the top of the track. For better visibility and easier drilling, remove the two brush strips first.
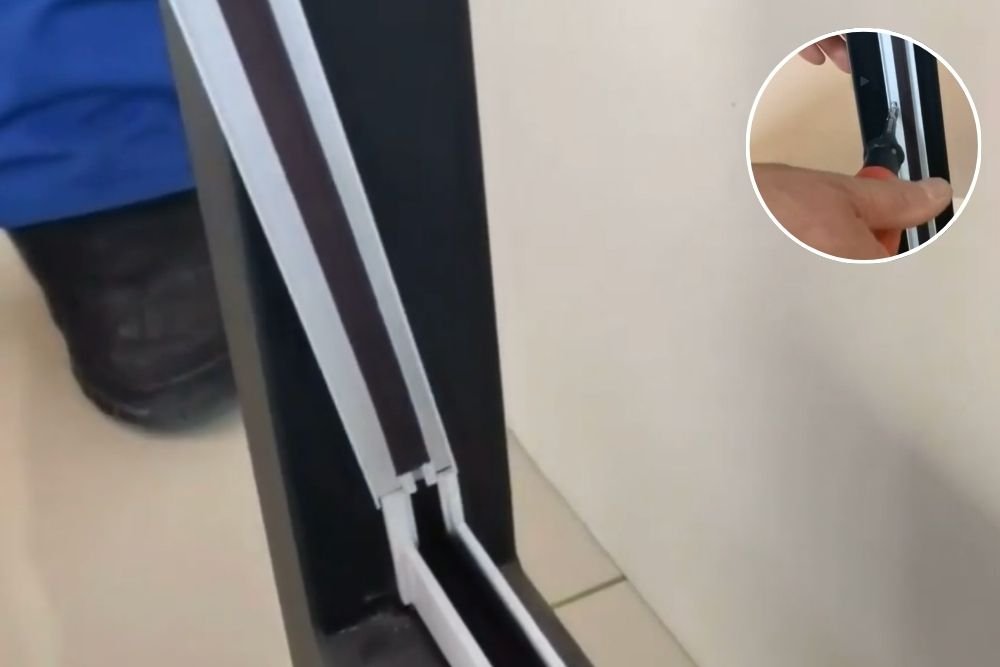
Insert the magnetic door strip into the locating posts of the bottom track, followed by the top track posts. Then, secure it to the door frame using the fixing screws.
Finally, push the screw caps onto the top and bottom of the cartridge.
Once you’re happy with the installation, apply a bead of bathroom sealant to the inside & outside edge of the cartridge and to the outside edge only of the bottom track. This method allows any water that enters the base of the cartridge—despite the drainage holes—to flow back into the shower tray from the inside.
Watch our detailed video on how to install Vero Door and trim down to fit smaller door frames.
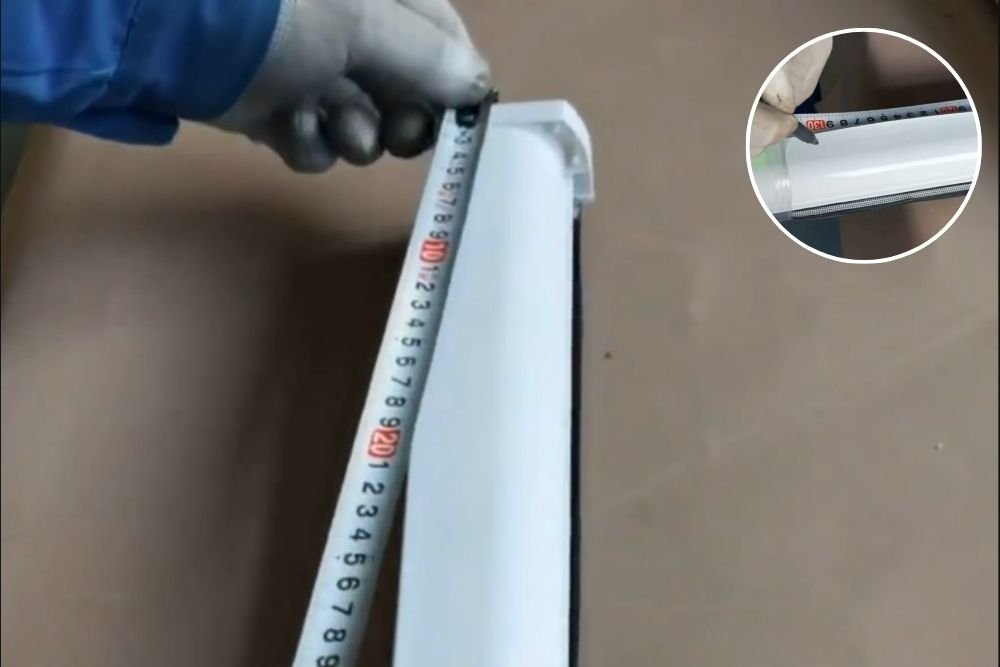
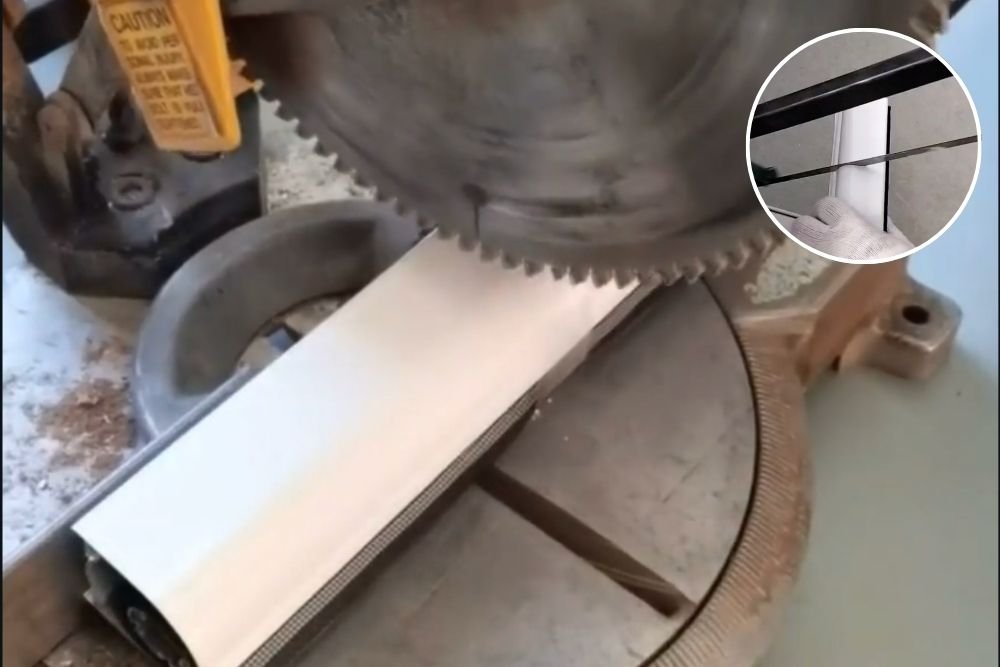
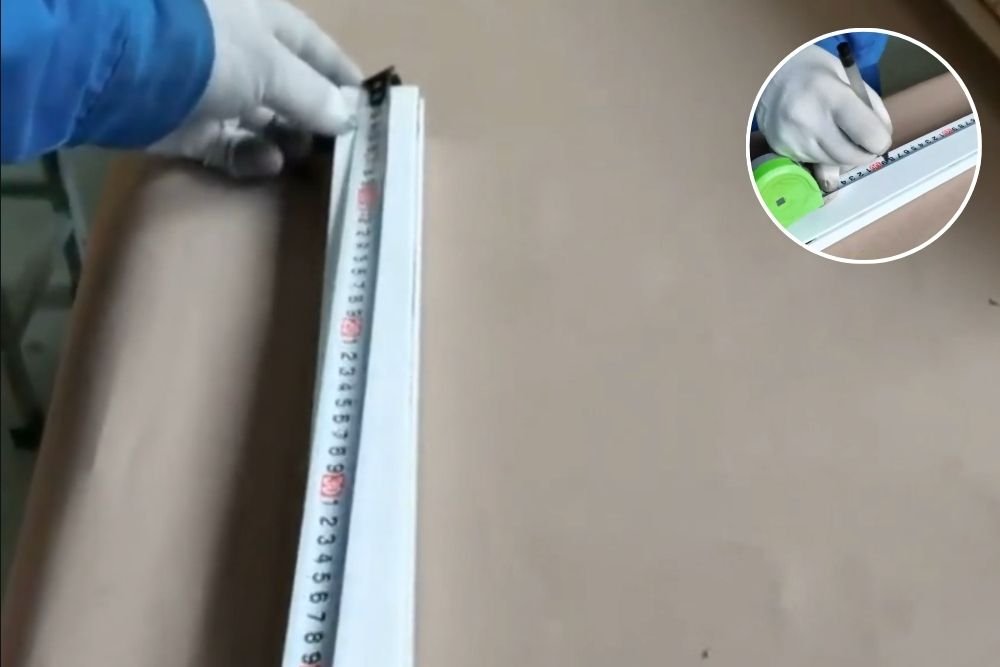
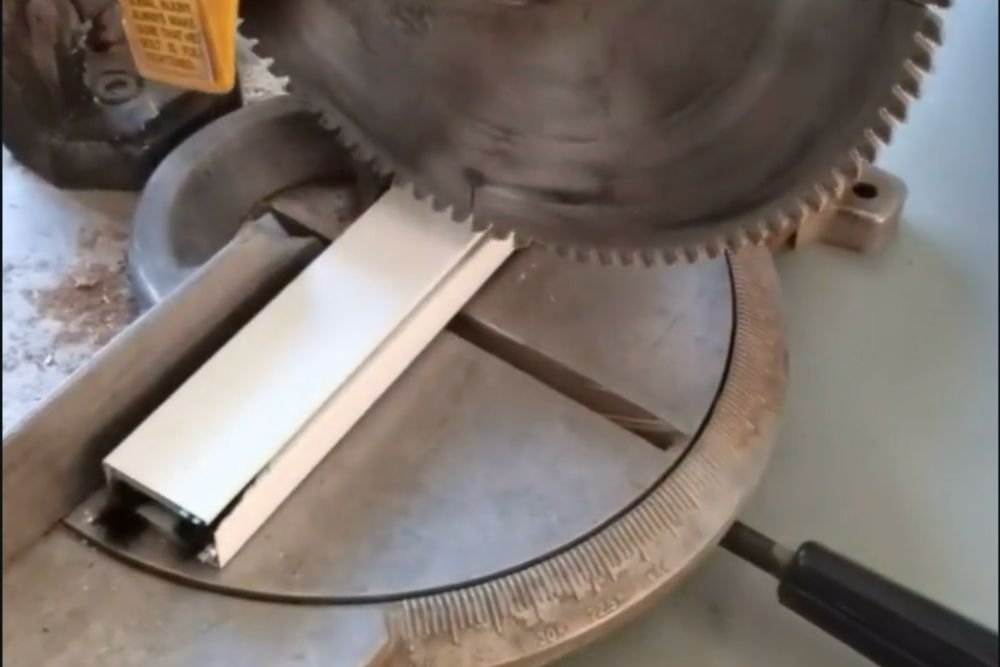
How to Cut
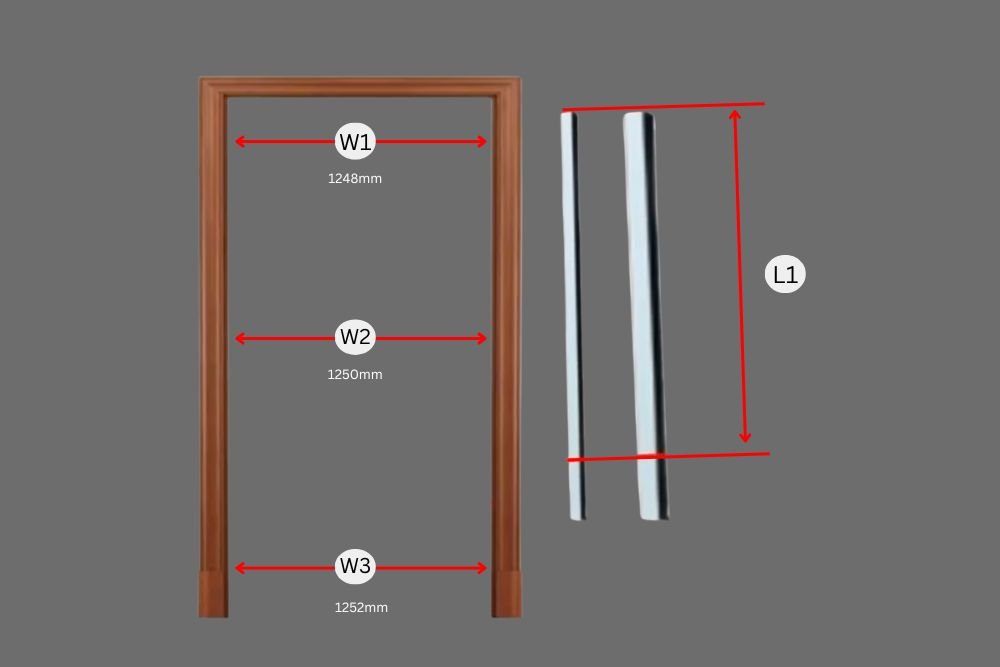
This is a brief overview of how to trim the Vero Door for installing into smaller door frames. For a more detailed guide, watch our video here on installation and trimming for smaller door frames.